As what as you like
-
Alfred 2 clipboard history
The toweringly awesome Alfred 2 app for OS X has a great clipboard history browser. This is how I suggest you configure and use it:
- Map a hotkey to the viewer (I suggest making it something involving the letter V, since Cmd-V is a normal Paste. I use Cmd-Shift-Option-Ctrl V because I have my Caps Lock key mapped to Cmd-Shift-Option-Ctrl)
- Turn off the option to show snippets at the top of the Clipboard History, because snippets are a whole different thing and not relevant to pasting history
- Turn on the option to auto-paste when you hit Enter on a given item
With these options all configured, all you have to do is hit the hotkey, select the old clipboard item you want and hit Enter. It will then be pasted into the active window.
This is also useful to preview the current contents of the clipboard before pasting (which is always a good idea if you’re pasting into a sensitive terminal or a work IRC channel and want to avoid spamming some random/harmful nonsense in).
-
Some more awesome Alfred 2 workflows
I keep finding super handy little things to do with Alfred 2 and so I thought I’d post some more:
- Alleyoop - updates installed plugins (if the workflow author supports it, which many currently do not). I hope this will be a temporary workaround until a centralised workflow repository is created.
- Battery - shows all the vital stats of your MacBook’s battery without having to run an app or a Terminal command.
- Built-in Sharing - lets you share files directly to all the social services that OS X supports.
- Paste current Safari URL - a workflow I wrote, which pastes the URL of Safari’s currently visible webpage, into the application you are using. No need to flip back and forth to copy and paste the URL
- Symbols - very easy, visual way to search the Unicode tables for a symbol you’re looking for (e.g. arrows, hearts, snowmen, biohazard warning signs, etc)
- TerminalFinder - lets you quickly get a Terminal for the Finder window you’re looking at.
I imagine there will be more to come, the total number of workflows is exploding at the moment!
-
Alfred 2 workflows
Since I started using OS X as my primary desktop, I’ve loved Spotlight for launching apps and finding files. I resisted trying any of the replacement apps, for fear of the bottomless pit of customisation that they seemed to offer. With the very recent release of Alfred 2, I was finally tempted to try it by the previews of their Workflow feature. The idea is that you can add new commands to Alfred by writing scripts in bash/python/ruby/php and then neatly package them up and share them with others. I was expecting to write a few myself and share them, but the user community has been spinning up so quickly that they’ve already covered everything I was going to write. Instead, I decided to use some time to write about the workflows I’m using so far:
- Google Search - get live results from Google as you type. It’s not always what I want when I’m searching, but it’s a very quick way to get some insight into the results available.
- New OmniFocus Inbox Task - Very quick way to create a new task for later triage
- Open SSH - This collects up all your hosts from SSH’s known_host file, config file and local network, then opens terminal windows for you to ssh to the host you choose.
- Parallels Desktop - Easy way to start/resume your Parallels virtual machines.
- Rate iTunes Track - does what it sounds like, rate the current iTunes track.
- Screen Sharing - quickly VNC to the hosts on your network that are advertising it (including iCloud hosts if you have Back To My Mac configured)
- VPN Toggle - get on/off your corporate network quickly.
Lots more on the Alfred 2 forums. At some point it would be nice to see this unified into some kind of integrated search/download feature of Alfred 2.
Update: (2012-04-12) I’ve written a second post that covers a few more workflows I’ve discovered since this one.
-
How the death of Google Reader looked in my Twitter timeline
-
LCD and a crazy disk chassis
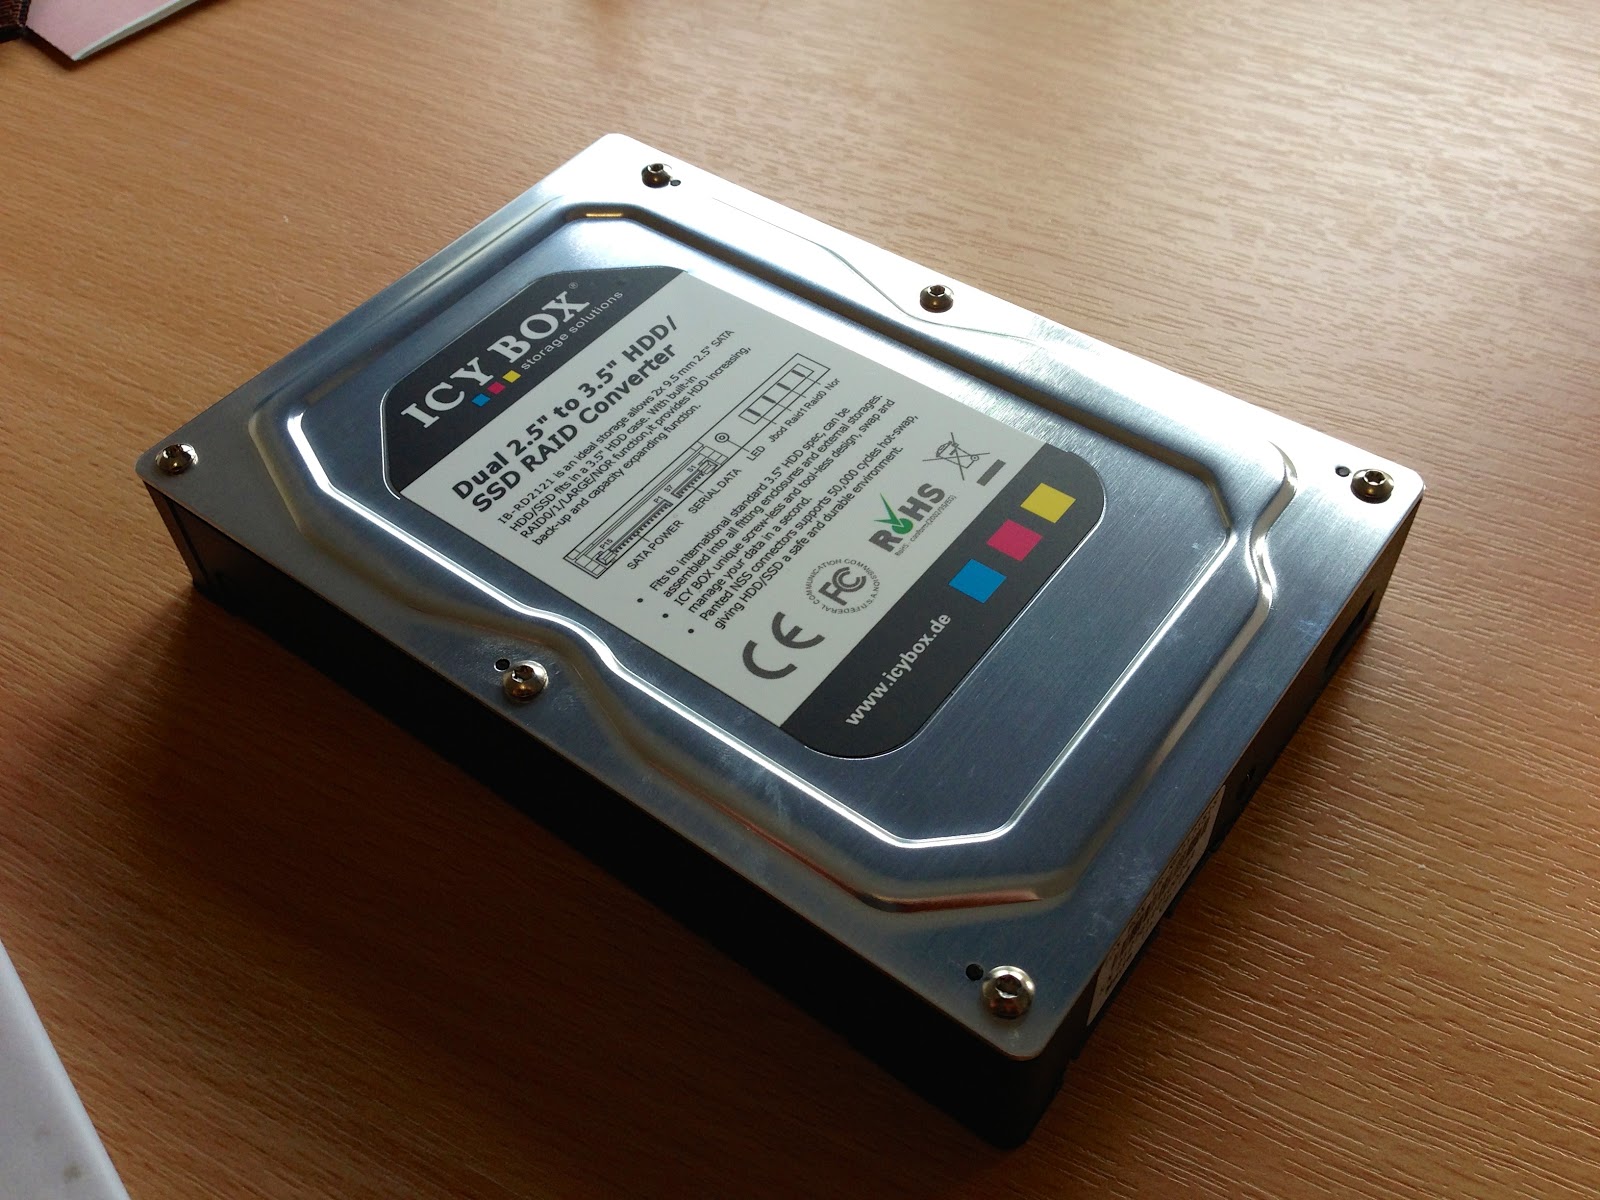
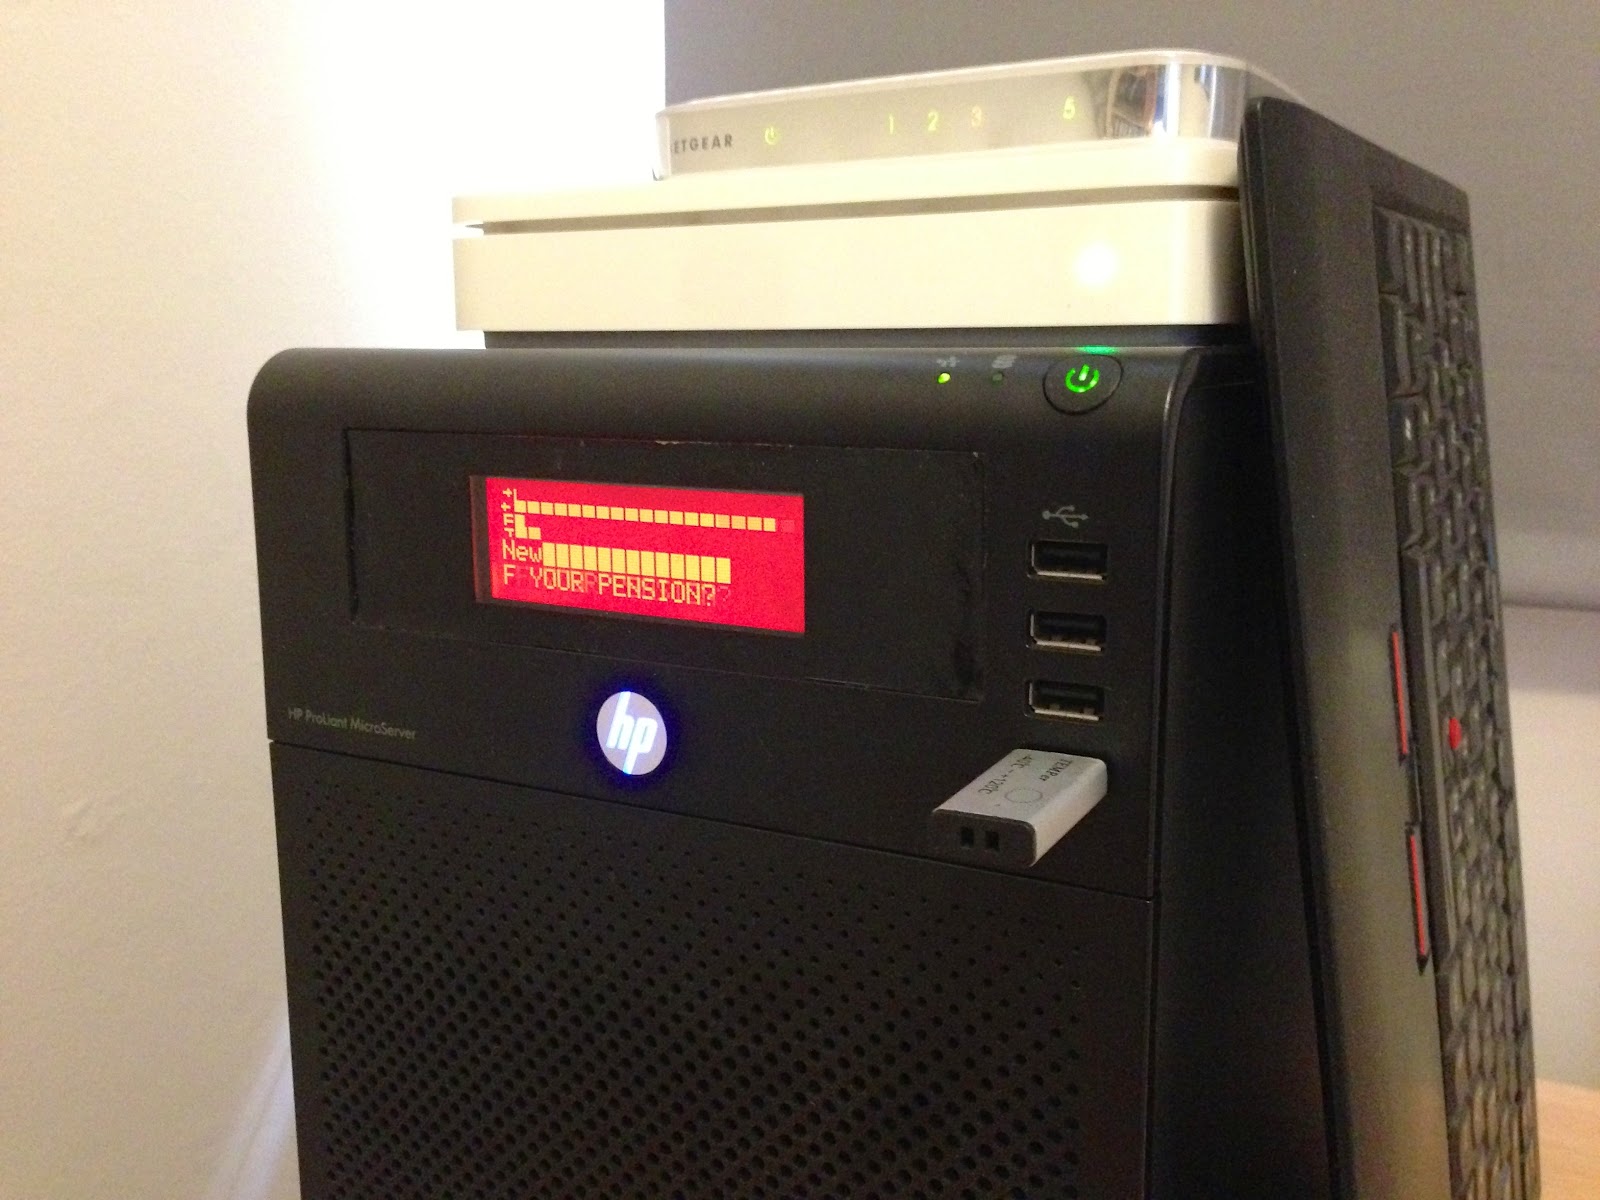
TL;DR, pics and a video, below the jump If you saw my recent post on some preparatory work I’d been doing for the arrival of an LCD status panel for my HP Microserver, it’s probably no surprise that there is now a post talking about its arrival :) Rather than just waste the 5.25” bay behind the LCD, I wanted to try and put some storage in there, particularly since the Microserver’s BIOS can be modified to enable full AHCI on the 5th SATA port. I recently came across the Icy Box IB-RD2121StS, a hilarious piece of hardware. It’s the size and shape of a normal 3.5” SATA disk, but the back opens up to take two 2.5” SATA disks. These disks can then be exposed either individually, or as a combined RAID volume (levels 0 or 1). Since I happen to have a couple of 1TB 2.5” disks going spare, this seemed like the perfect option, as well as being so crazy that I couldn’t not buy it! The LCD is a red-on-black pre-made 5.25” bay insert from LCDModKit. It has an LCD2USB controller, which means it’s very well supported by projects like lcd4linux and lcdproc. It comes with an internal USB connector (intended to connect directly to a motherboard LCD port), except the Microserver’s internal USB port is a regular external Type A port. Fortunately converters are easy to come by. Something I hadn’t properly accounted for in my earlier simulator work is that the real hardware only has space for 8 user-definable characters and I was using way more than that (three of my own custom icons, but lcd4linux’s split bars and hollow graphs use custom characters too). Rather than curtail my own custom icons, I chose to stop using hollow graphs, which seems to have worked. Pics and a video below the jump.

The Icy Box enclosure 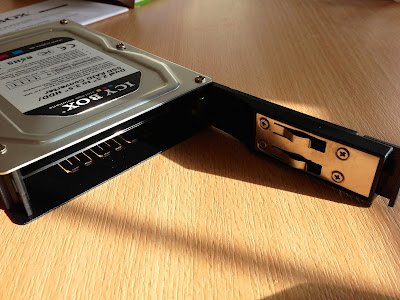
Ta-da! The back opens up 
Selector switch for which type of volume/RAID you want 
Marrying the Icy Box and the LCD. Only a small amount of metalwork required. 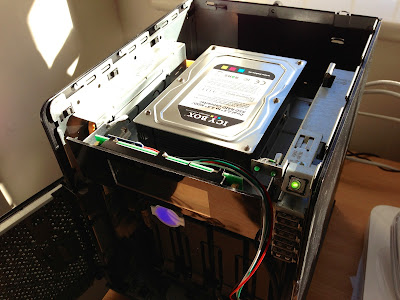
Icy Box and LCD being installed 
Finished install! The display in glorious HD.